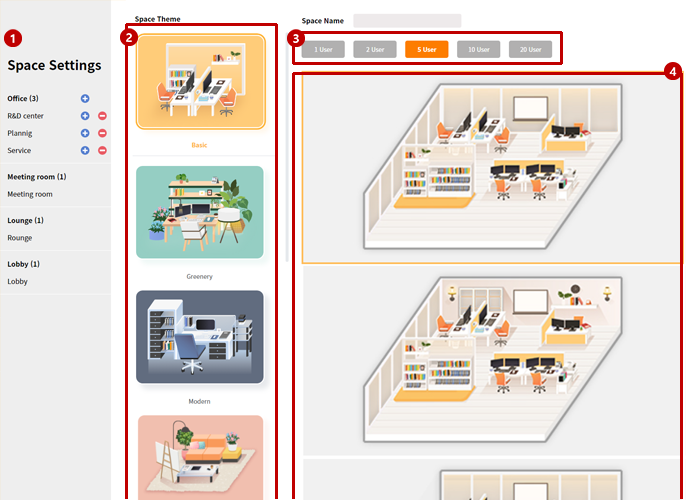
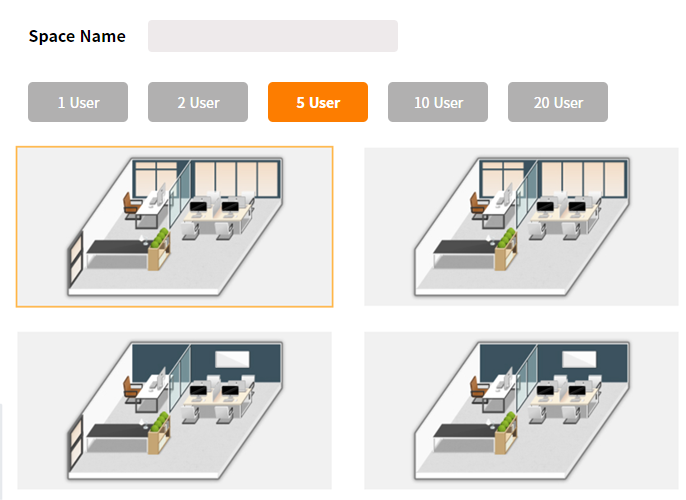
Space Settings
Admin can choose spaces that he/she wants to organize. This is where you can select themes, enter the name of the office and choose the size of each space.
Tip
In order to arrange a space, "Space Settings" must be done first.
Orders for Space Settings
1Creating a Space
process of creating basic spaces necessary for companies, such as R&D teams or project planning teams.
Click the "+" button on the right side of the Office and add departments you need to create.
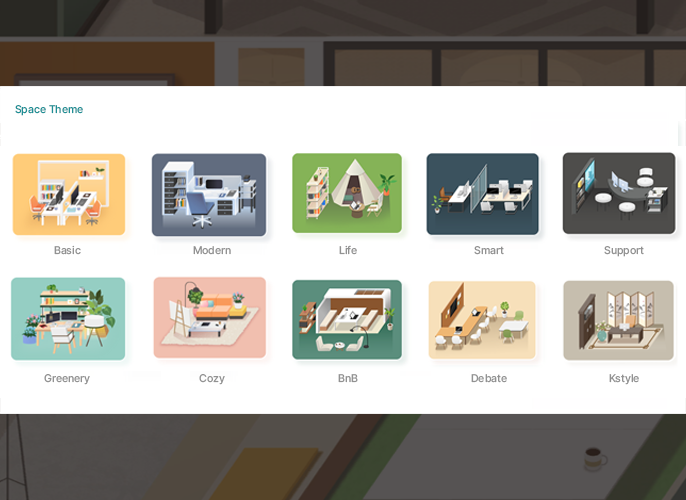
You can create multiple styles of spaces from the theme.
Currently, JoyCollab is updating the themes continuously. Choose a theme that best fits your company.
You can set the size of the space (1/2/5/10/20user) for each department. Enter the name of each space chosen.
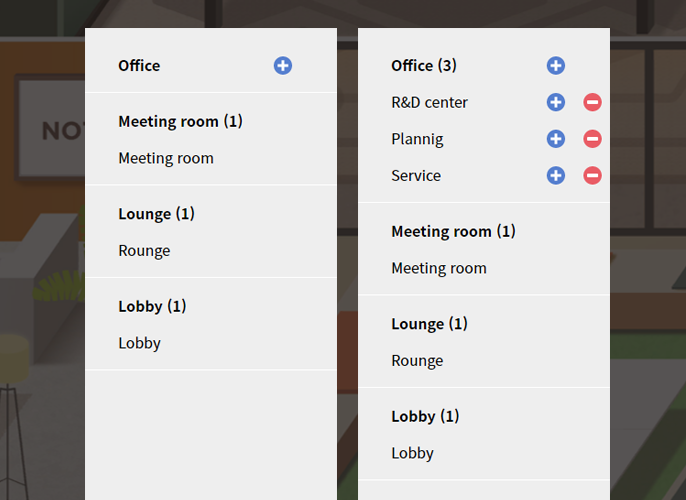
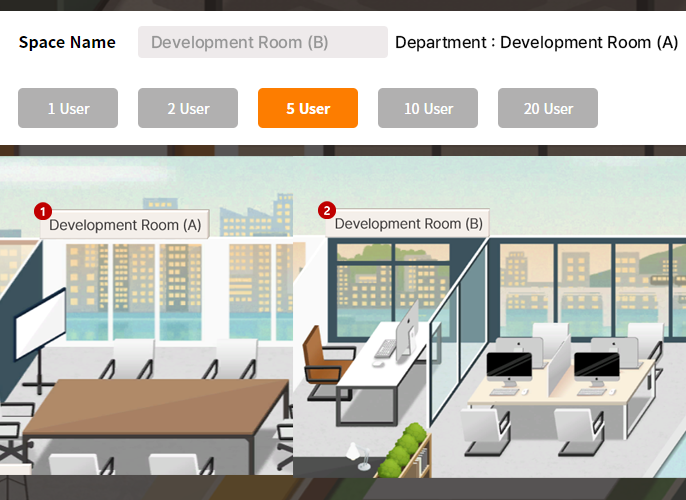
2Creating an extended space
You can extend the existing space.
You can extend the space if there are more people to put in the same department. Choose the R&D Team(1) and click the "+" button then enter a name for the extended space.
After entering the name of the space, apply the size and themes.
Now, you can see the extended space created on the right side of the R&D Team(1).
Tip
- Extended Space
The largest space in JoyCollab is for 20 users, so to add more users you can use this extended space.
For example, if you need 20 more seats for the R&D Team then can extend and add 10 users each for R&D Team(A) and (B) under the R&D team. You can keep add more users using this method.
Extended place shares file storage, notice, and etc. with the upper space and all the members in the upper space and the extended space can see the emojis/gestures/IM.
- After setting up all the spaces, you can invite the members from the Member Settings.
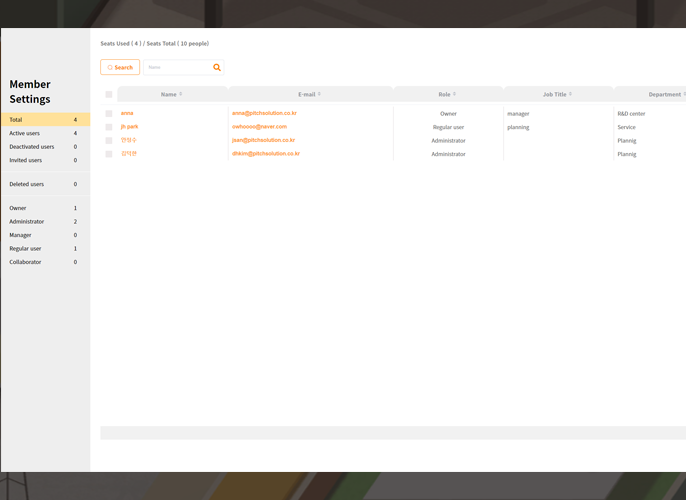
Member Settings
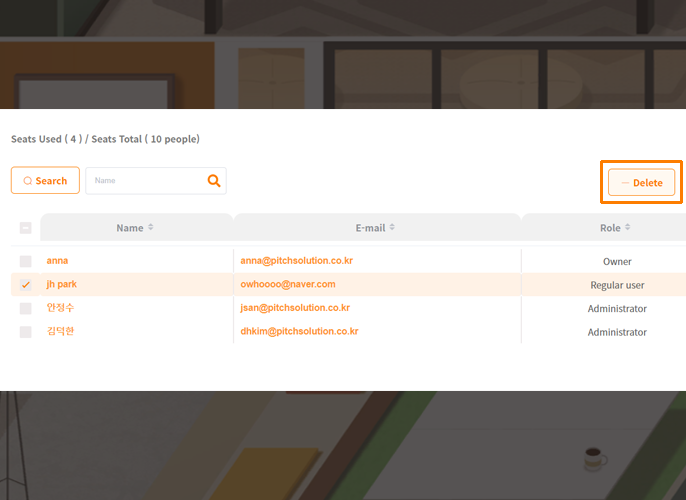
Admin can invite/delete/edit all members from this page.
Channel
You can check the current status of all members in the office.
| Member Status | Role |
|---|---|
| Active | Owner |
| Deactivated users | Administrator |
| Invited users | Manager |
| Deleted users | Regular user |
| - | Collaborator |
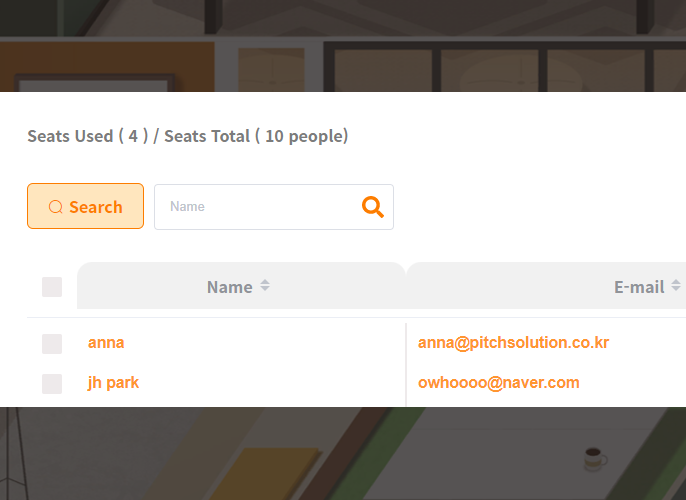
Search members
You can search members from the workspace.
You can check the email address, role, job title, department, and status.
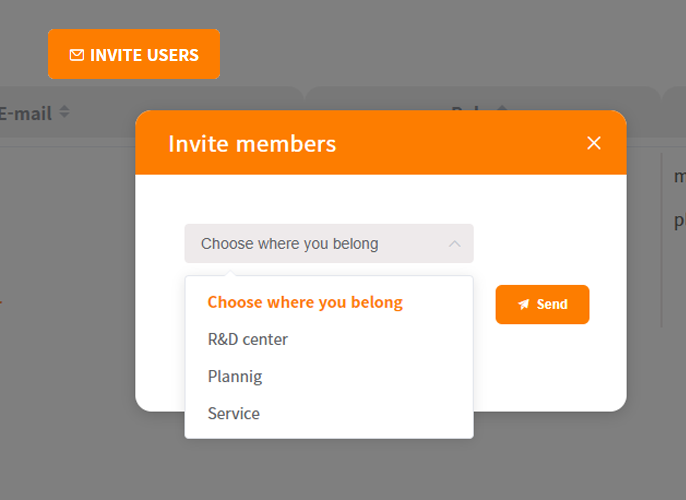
Invite users
Just by entering the email and the department, you can send an invitation to those who are not registered as a member by pressing, "Invite Users" button.
Tip
- After the invitation is completed, you can create spaces from the Space Settings and Space Layout. In addition, you can place seats for the invited users in the Space Layout.
- - Members who have already been registered cannot be added.
Edit Members
Admin can edit information except the email address.
You will see the edit page by clicking the name or the email address of the member list.

Delete Users
Admin can deactivate or delete all users.
To delete a user, check the user's check box and press "Delete" button. The user will no longer be able to login.
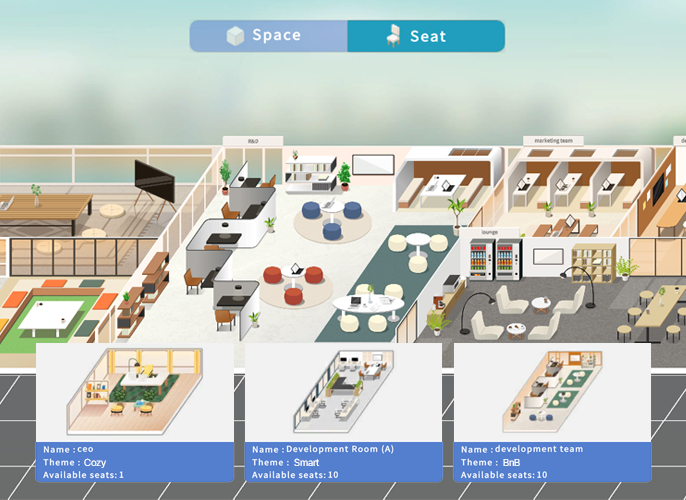
Space Layout
Here the admin directly arranges the space applied in "Space Settings". Select a space(room) you want to place, put the space on the desired location.
Applying Space Themes
After saving the space made previously, you can arrange spaces by clicking the gear icon and then Space Layout button.
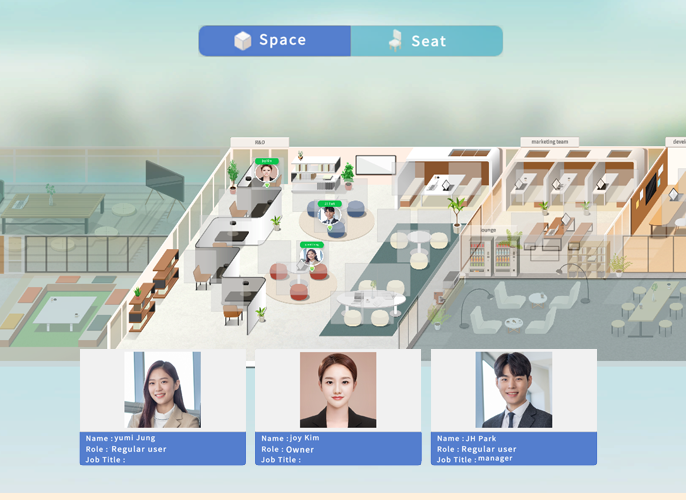
Seating Plan
After arranging your space, you can now assign seats for all members.
Click "Seat" button, click a department (a space) then the list of members who are not placed will appear.
Tip
- You can't place a member in a department(space) that he/she does not belong.
- It is recommended to arrange and set up the spaces first before assigning seats for members.
- The available seats are in gray square.
Arranging Seats
Please double click the image at the bottom of the page to place a seat for each avatar. You can place a user to an empty seat by dragging the avatar.
Cancelling Seats
You can cancel the placement by pressing the right button of your mouse.
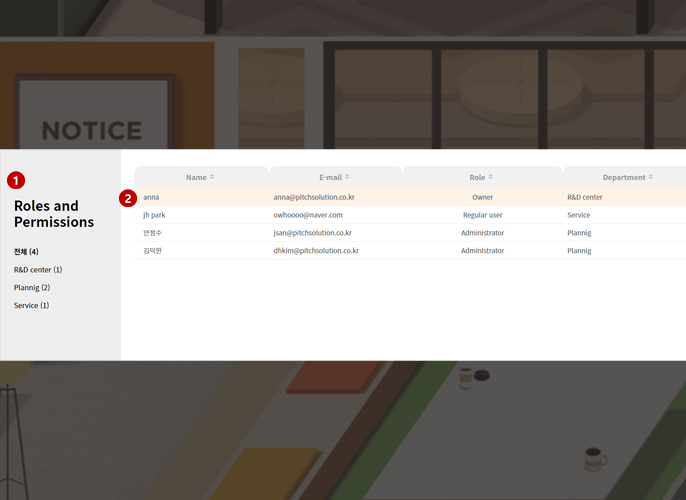
Roles and Permissions
Admins can change or edit roles and permissions for each user from this page.
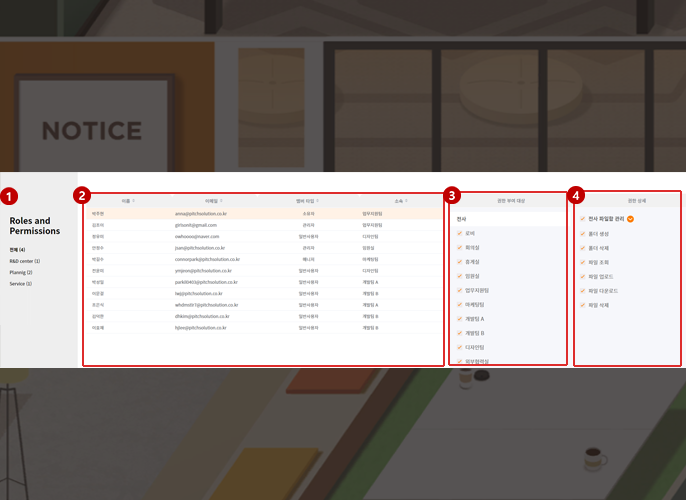
It is possible to see by departments from the left menu panel. You can provide roles and permissions within the department.
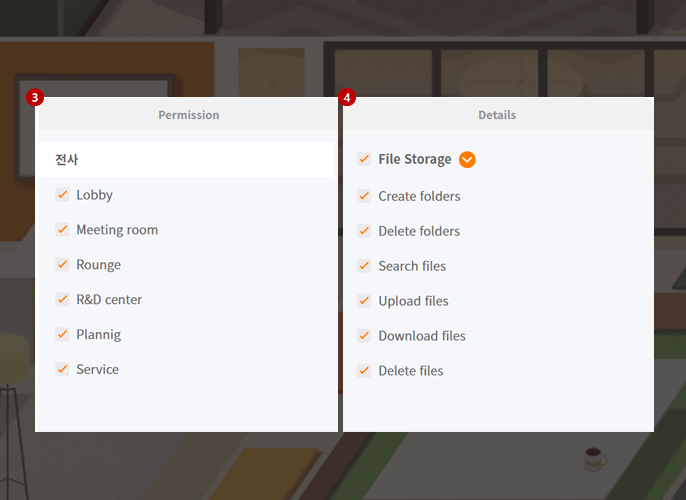
Select a user and select Permission type. Also, you can set details for each permission.
Tip
- Click Department (Office space) > Select a user > Select Permission type > Select Details
- The check box will not be activated if you don’t have the permission.
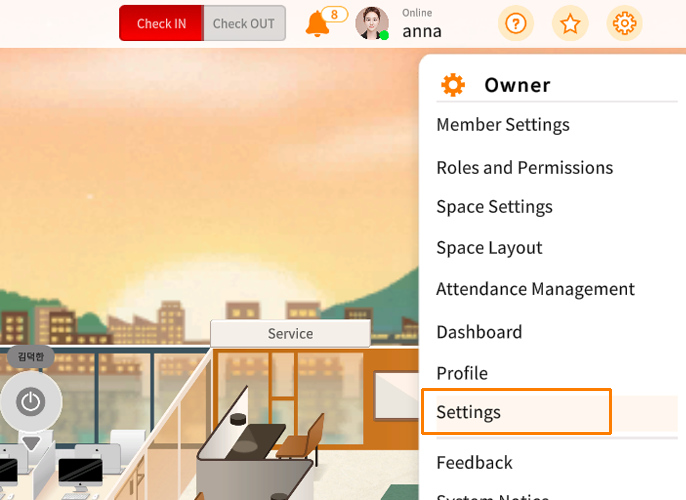
Settings
Users can set up, integrate or cancel various functions from Settings.
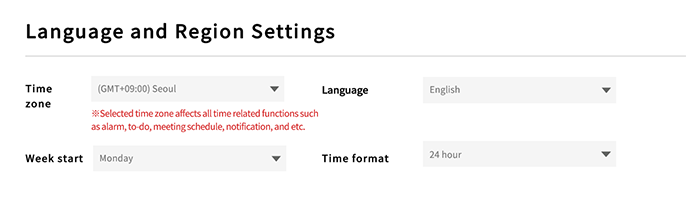
Language and Location
Users can set time zone/language/date format/time format/week starting date.
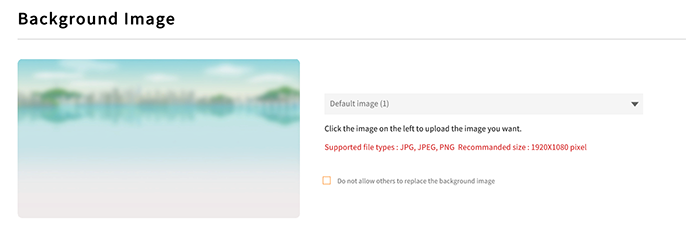
Background Image Setting
You can put your own image for your office background. It is set as a default image initially.
File Formats: jpg, jpeg, png
Size recommended: 1920 x 1080px
Tip
- You can check the box, "Do not allow others to replace the background image." If the check box is checked, the users cannot change the background images. Only the admins or the owner can change the background.
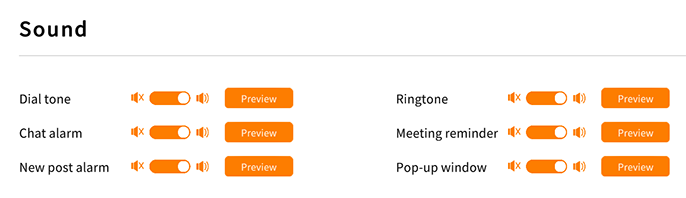
Sound Settings
Users can set incoming/outgoing notification alarms.
Users can listen or set on/off for the sound.
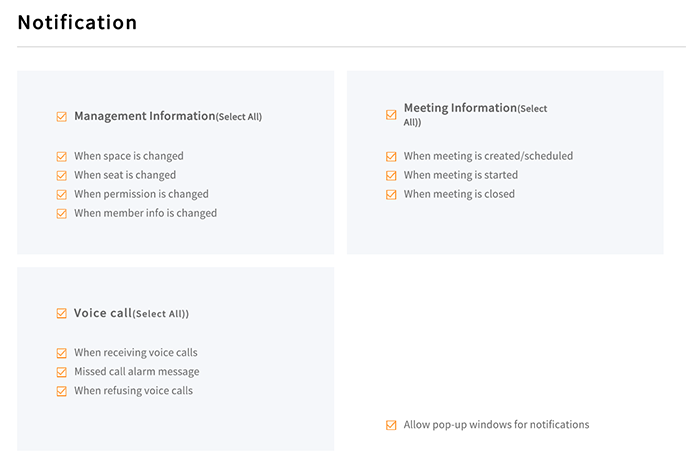
Notification Settings
Management Information / Meeting Information / Voice Call
Users can receive alarms when there are changes made in the workspace.
You can also allow pop-up windows for notifications.
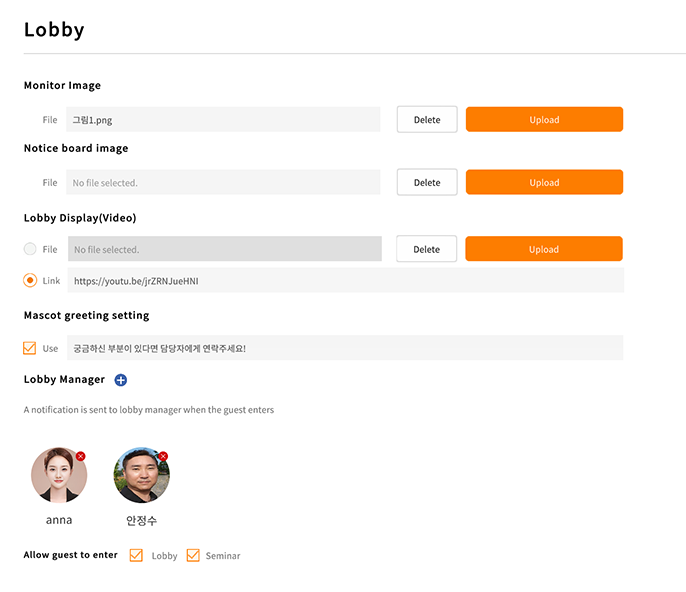
Lobby Settings [Admin]
Admin can assign a lobby manager. A pop-up message will appear to the manager when a guest comes in. Admin can set an URL for the lobby screen and allow a guest to enter or disable this function. Only the admins can see this part.
Attendance Settings [Admin]
Admin can set the use of attendance and can also set a break time.
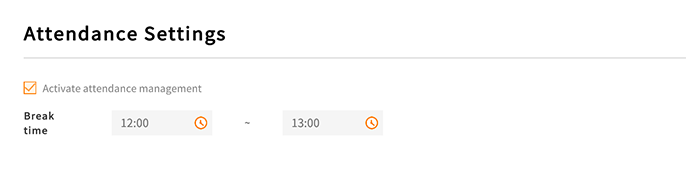
Tip
- If the admin uses the attendance function, a button will appear on the top of workspace.
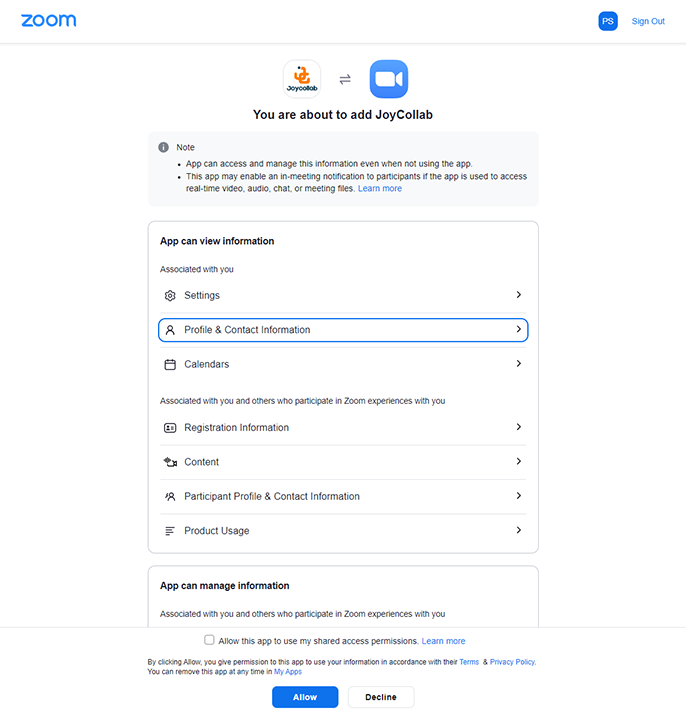
Zoom Integration

Admins can choose between Zoom or JoyCollab video conference solutions.
If you are going to select "Zoom" instead of "JoyCollab", you must integrate your Zoom account here before creating a Zoom meeting in the Video Meeting Room.
Click the "Connect" button then a pop-up will appear to integrate with Zoom.
After logging in is completed, the button will be changed to [Disconnect] and your Zoom Id will be shown. Now you can select Zoom when creating meetings.